In principle, you can turbocharge just about any car engine. However, there are power units that will truly benefit and stand out with this upgrade while there are others that are just not worth it.
Key features and my opinion about the K20A engine
- Production years:2001-now
- Average lifespan of K20:180,000-220,000
- Fuel supply type:port injection (later - direct injection)
- Power range:153-320 hp
- Fuel efficiency:average
- Engine block material:aluminum
- Engine reliability score:medium
- The most common problems:exhaust camshafts are weak, no lifters, throttle contamination, oil leaks, engine mounts problems.
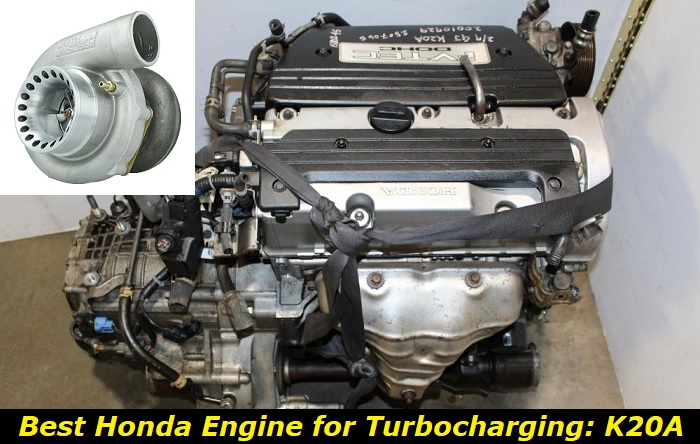
Best Honda Engine to Turbo: 2.0L K20A Engine
Most fans of the Japanese automaker or the Japanese Domestic Market (JDM) may agree if we say that the best Honda engine to turbocharge is the K20A model. This engine is a great candidate for turbocharging because it is incredibly powerful, efficient, and durable. When turbocharged and matched with other performance-enhancing mods, the K20A can produce up to 400 horsepower or even more as some claim, turning it into one of the most powerful Honda engines out there.
Additionally, the K20A is also very fuel efficient, so you'll still be able to keep your gas consumption within manageable levels while still getting great performance. It should be noted though that the true purpose of turbocharging is to squeeze the most power out of the engine it is matched with, so any questions about fuel economy are definitely thrown out of the window in this discussion.
Moreover, the K20A is known for its high level of reliability, so you can be confident that your turbocharged engine will last for many miles and years to come. Thanks to its durable build, a K20A turbocharged engine can easily provide you with hundreds of thousands of miles of trouble-free driving. It should be noted that the lifespan of the engine's stock version could be stretched up to 200,000 miles with proper maintenance as with other K-series engines.
All in all, the K20A is an excellent choice for anyone looking to turbocharge their Honda engine. It's powerful, efficient, reliable, and will provide you with years of great driving. It's for this reason that many JDM car fans have swapped their stock engines for this.
What Could Go Wrong?
When turbocharging a Honda car, there are many things that could go wrong. First, a turbocharger with questionable quality can lead to problems with fitting, airflow, or boost pressure. Second, the ECU may not be properly programmed for the new turbocharger.
This could result in improper engine operation or damage to the engine. Third, the wrong fuel injectors may be used. This could cause lean or rich running conditions, which could damage the engine. Finally, the wrong exhaust system could be used. This could lead to backpressure issues or increased noise levels.
To avoid these problems, it is important to consult with an expert before upgrading your Honda car's turbocharger. Make sure that you use the correct parts and that they are installed properly. Also, be sure to have the ECU reprogrammed for the new turbocharger. Lastly, make sure that you use the correct fuel injectors and exhaust system. By following these tips, you can help ensure that your Honda car's turbocharger upgrade goes smoothly.
Things to Consider Before Turbocharging
There are some factors that you have to consider when choosing the right turbocharger for your Honda car. First, you'll need to decide what size engine you have. This will determine the size of the turbocharger you'll need.
Second, you'll need to consider the type of driving you do most often. If you do a lot of stop-and-go driving, you'll need a different turbocharger than if you do mostly highway driving.
Third, you'll need to think about your budget. Turbochargers can range in price from a few hundred dollars to several thousand dollars.
Finally, you'll want to consult with a qualified mechanic or dealership to make sure you're choosing the right turbocharger for your car.
Turbocharger Installation
The processes involved in turbocharger installation vary slightly depending on the kind of engine, turbocharger kit, or other mods that you want to incorporate with the upgrade.
Nonetheless, we'll walk you through everything you need to know about installing a turbocharger upgrade on your Honda engine to give you an idea of the work required for the project or to give you the basics if you decide to do it yourself.
Tools and Materials Needed:
- Socket wrench set
- Torque wrench
- Ratchet
- Phillips head screwdriver
- Flathead screwdriver
- Pliers
- Adjustable wrench
- Honda K20A engine block (with or without cylinder head attached)
- Turbocharger unit of your choice (consult a professional if you're unsure which turbocharger is best for your application)
- Intercooler (if applicable)
- Oil drain pan
- Funnel
- Rags or shop towels
- Gasket sealant
Step 1: Preparing the Engine Block for Turbocharger Installation
It's important to make sure that the engine block is clean and free of oil and debris before installing the turbocharger unit. This will help ensure a proper seal between the turbocharger and engine, as well as prevent oil leaks.
- Remove any existing cylinder head or intake manifold that may be attached to the engine block.
- Clean off the engine block surface where the turbocharger will be mounted using a rag or shop towel.
- Inspect the surface for any cracks, damage, or irregularities. If any are found, consult a professional to have them fixed before proceeding with the installation.
Step 2: Installing the Turbocharger Unit
Once the engine block is prepared, you can begin installing the turbocharger unit.
- Apply a generous bead of the gasket sealant around the circumference of the oil inlet on the turbocharger.
- Carefully put the turbocharger unit into place on the engine block, aligning the oil inlet with the opening on the block.
- Hand-thread each of the bolts (supplied with your turbocharger kit) through the flange on the turbocharger and into the engine block.
- Tighten each bolt a few turns until they're snug, but don't overtighten as this can damage the threads.
Step 3: Attaching the Intercooler (if applicable)
If you're using an intercooler with your turbocharger setup, it will need to be installed next.
- Again, apply a few drops of the gasket sealant around the perimeter of the intercooler inlet/outlet ports.
- Lower the intercooler into place on the turbocharger unit with due care while making sure that the inlet/outlet ports are lined up with the openings on the turbocharger.
- Manually thread the bolts (provided in your turbocharger kit) through the flange on the intercooler and into the turbocharger unit.
- Torque the bolts until they're fitted properly.
Step 4: Installing the Intake Manifold
The intake manifold will need to be installed next in order to complete the turbocharger installation.
- Put a generous amount of the gasket sealant around the intake manifold ports.
- Install the intake manifold on the engine block, and make sure that the ports are lined with the openings on the block.
- Thread each of the bolts (coming from your turbocharger kit) through the flange on the intake manifold and into the engine block.
- Torque the bolts as recommended.
Step 5: Installing the Cylinder Head (if applicable)
If you're using a cylinder head with your turbocharger setup, it will need to be installed next.
- Drop an adequate amount of gasket sealant to cover the edges of the cylinder head ports.
- Place the cylinder head on the engine block. See to it that the ports correspond with the openings of the engine block.
- Put each of the bolts (supplied with your turbocharger kit) through the flange on the cylinder head and into the engine block.
- Tighten each bolt to its ideal torque.
Step 6: Connecting the Turbocharger to the Exhaust System
The next step is to connect the turbocharger to the exhaust system. This can be done using a variety of methods, depending on your specific setup.
- If you're using a wastegate, it will need to be installed between the turbocharger and exhaust system.
- If you're using an external wastegate, it will need to be installed between the turbocharger and exhaust pipe.
- If you're not using a wastegate, you'll need to install an exhaust manifold between the turbocharger and exhaust pipe.
Step 7: Installing the Oil Feed and Return Lines
The final step in installing the turbocharger is to install the oil feed and return lines.
- For the last time drop a generous bead of the gasket sealant all over the circumference of the oil inlet/outlet ports on the turbocharger.
- Carefully lower the oil feed line into place on the turbocharger, aligning the inlet/outlet ports with the openings on the turbocharger.
- Hand-thread each of the bolts (supplied with your turbocharger kit) through the flange on the oil feed line and into the turbocharger.
- Tighten each bolt until they're fitted correctly.
- Repeat this process for the oil return line.
The process shown here may look easy on paper, but the installation of a turbocharger for your Honda K20A engine is a pretty involved process that is best done by a qualified mechanic because of its technical nature. Add the fact that cars nowadays are equipped with complicated equipment, especially in their tech. So, a lot of things can go wrong with its improper installation.
Conclusion
Honda engines have been known for their affordability but never lacking in terms of quality, performance, and durability. The K-Series engines are among the many products of the brand that embody the said traits. When it comes to turbocharging, our money goes to the K20A as the best out there to receive such an upgrade due to its versatility when it comes to tuning.
About the authors
The CarAraC research team is composed of seasoned auto mechanics and automotive industry professionals, including individuals with advanced degrees and certifications in their field. Our team members boast prestigious credentials, reflecting their extensive knowledge and skills. These qualifications include: IMI: Institute of the Motor Industry, ASE-Certified Master Automobile Technicians; Coventry University, Graduate of MA in Automotive Journalism; Politecnico di Torino, Italy, MS Automotive Engineering; Ss. Cyril and Methodius University in Skopje, Mechanical University in Skopje; TOC Automotive College; DHA Suffa University, Department of Mechanical Engineering


Add comment