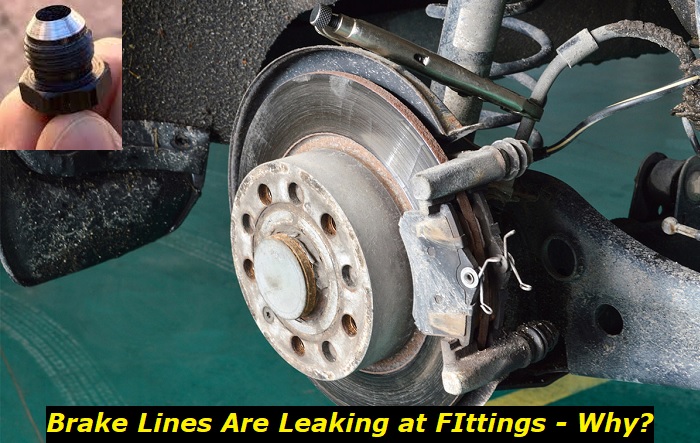
Your vehicle is made up of numerous systems, among them the braking system. The braking system in your vehicle plays a crucial safety role and drivability of the vehicle. If there is a problem with the brake system, you run the risk of getting into an accident.
Brake fluid problems highlights
- Level of urgency:super-urgent
- DIY diagnostics:usually,impossible
- DIY repairs:impossible
- Price for repair:$250 - $650
- Common symptoms:pedal goes to the floor, braking efficiency low, leaks
- Commonreasons:brake lines leaking, low fluid,badfluid
- If ignored:no brakes, getting into accidents, poor safety when driving

The brake line leaking at the fitting
Whenever you check the brake fluid level and find it low, you should not always rush to refill it first. Check for any leakage, which, in most cases, is the main reason behind the low brake fluid level in the master cylinder. An area of importance should be the brake line fitting when you are checking for any brake fluid leakage.
A brake line will leak at the flare whenever there is a poor connection between the line and the seat of the fitting. In many instances, a weep happens when there is a slight imperfection occurs while flaring the line.
To understand brake line fitting leakage, you must first acquaint yourself with the various brake line fittings. Each fitting requires a specific fix to make it stop leaking. Basically, four fittings are used on brake lines where a leakage can happen.
1) Unions
A union is used to join brake lines together. If you want to join two brake lines, a union is used to offer an uninterrupted flow of the high-pressure brake fluid. They can be said to be double-ended tube seats. They have threads on both ends where two lines are threaded. This fitting is usually made of brass and will thread smoothly into matching tube nuts. A leaking union, which is ideally fitted by the manufacturer, will rarely leak.
2) Tube nuts
Tube nuts are used to secure many brake lines found in your car. A tube nut will generally be used to secure a flared end of a line into the tube seat of a certain assembly. A seat has an inner shape that only accepts a certain flare form. The flare can be ISO, SAE, inverted, or bubble, which means you should find the specific tube nut that matches this flare. The dimensions of the tubing and the tube seating are critical in helping determine the right tube nut to buy.
3) Adapters
Adapters are fittings that are best used when you want to change the diameter of a brake line. The adapter will usually have a female and a male end where different lines of differing diameters are fitted. The male and female ends are designed to accommodate the same flare shape, but some work with different types of flares.
When buying these brass brake line fittings, you need to take note of the following;
- The shape of the male and female ends.
- The length of the male size in relation to the tube seat it will be going into.
- The distance between the two lines you want to join using the adapter.
4) Bleeder screws
Bleeders are used to bleed brake fluid out of the hydraulic parts to allow for repair work. They have a unique design and are machined with a small tube running through their length, allowing you to bleed the brake fluid by simply turning it slightly. A bleeder has a hex and a significant thread, which can be turned using a wrench. Inside the little tube running inside the bleeder screw is a small ball braced to seal the master cylinder.
How to fix a break line fitting leakage
When a break line fitting is the cause of leakage, you want to use the best expertise to address the issue. This is mainly because the braking system works under hydraulic pressure, which is substantial, and also because you need to know the seat and fix the fitting correctly.
First, you will need to know how to properly seat a break line fitting. For this to work, you will need a line wrench and a deep well socket. A continuous witness line should go all around the inner cone inside your fitting. This is to ensure that the line is centered and seats properly inside the fitting.
1) Installing a new fitting
When installing your fitting, you must ensure the brake line is seated correctly on the witness line inside the fitting. This is guaranteed by using a deep well socket. If the line is not properly centered, you will use the socket to bend the line to the correct position. The adjustments are made until the line is correctly seated on the witness line of the fitting and the line does not move about.
In the case of a tube nut, you should slide the nut to allow for the line to sit properly on the witness line. Once the flare is correctly placed, slide the tube nut back and tighten it with your fingers. Once the nut feels tight, use a line wrench to tighten it snugly and then half-turn it anticlockwise.
Tighten the nut again, adding half a turn more than the previous turn and loosening it again. Repeat this process four times. Once done, snug your flare to the cone with the line wrench. This way, you will have correctly fitted a brake line, and there is no risk of leakage. Over-tightened fitting will be problematic and leaky.
2) Resurface the fitting
If the damage to the fitting is not extensive, you can opt to resurface it and save yourself time and money. This option requires the use of a fitting into the fitting fixer guide. A fitting fixer guide is a set of tools that helps remove any imperfections on a brake line fitting and other metal fittings found in your car. Rather than replacing the fitting, you can use this guide to restore a flared fitting, hence removing any leakage.
A fitting fixer guide goes for around $50, though there are those that will set you back $200. In most cases, it is a mechanic who will need this guide since they use such tools on a daily basis. Unlike in the years when a damaged fitting had to be replaced, you will only need a fitting fixer guide to restore such a metal fitting. Here are the steps to follow;
Start by screwing the fitting fixer guide:
- Once the drill is set, connect the lapping head. Follow this by inserting the lapping head into the guide and over the fitting.
- Start spinning the lapping head on the fitting and release every 2 or 3 seconds. This helps prevent any clogging of the guide.
- After making about 5 passes, it is time to remove the fitting and inspect the surface. If unsatisfied, repeat the above step until the desired results are achieved.
3) Lapping
Lapping of brake line fitting is a long practice in the industry. Lapping was done to ensure even after doing a perfect job, the fitting is guaranteed to be leak-proof. Lapping helps the fitting flare seat perfectly. Here are a few steps to follow;
- Start by unscrewing and detaching the fitting from the brake line.
- Using the appropriate collect, clamp the line. Follow this by connecting the brake line to the lapping tool. Make sure to use some lubricant before using it.
- Now rotate the lapping head back and forth. Once you have rotated about 6 or 8 times, inspect the flare. The final outcome should be a smooth concentric finish.
- If the desired result is not achieved, repeat the above step.
- Once the brake line is lapped to your satisfaction, remove it and connect it to the fitting. It is always prudent to bleed the brakes to see if the leaking has been resolved completely.
Conclusion
Brake line fittings can leak due to an array of reasons. They can leak or weep due to aging when your vehicle is involved in an accident or if improperly fitted. Depending on the reason for the leak, you have several ways to restore your vehicle's braking system.
Whether resurfacing, lapping, or replacing the fitting, you will need to take utmost care while at it. If it is too tight, the threads of the fitting and the brake line will get damaged; if it is too loose, the brake fluid will almost certainly leak. It is for this reason you will need the services of a qualified mechanic.
About the authors
The CarAraC research team is composed of seasoned auto mechanics and automotive industry professionals, including individuals with advanced degrees and certifications in their field. Our team members boast prestigious credentials, reflecting their extensive knowledge and skills. These qualifications include: IMI: Institute of the Motor Industry, ASE-Certified Master Automobile Technicians; Coventry University, Graduate of MA in Automotive Journalism; Politecnico di Torino, Italy, MS Automotive Engineering; Ss. Cyril and Methodius University in Skopje, Mechanical University in Skopje; TOC Automotive College; DHA Suffa University, Department of Mechanical Engineering


Add comment