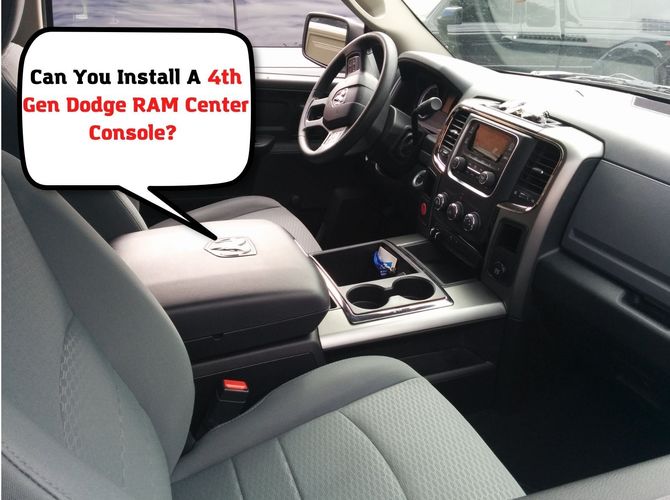
A Dodge RAM center console offers a lot of convenience and functionality. It helps keep the cabin organized by keeping your things out of the way yet within reach. You can further enhance the functionality of your stock center console by replacing it with an aftermarket one. But you have to make sure that the console you choose will fit in your model.
So, can you install a 4th Gen Dodge RAM center console into 2nd or 3rd Gen RAM? If it’s possible, how can you do it? If these are the answers you’re looking for, then, this post is for you. Keep reading.
Can You Install A 4th Gen Dodge RAM Center Console Into 2nd Gen RAM?
Besides the nice cup holders, the 4th Gen RAM center console usually comes with a 12V outlet. It will also feature an AUX plug (headphone connection) and a USB plug. Fixing all these may be tricky for most of us. But, the swap is easy, especially for the mounting itself and getting the 12V outlet to work. The issue may be hooking up the AUX and the USB ports successfully.
But, the simple answer to this question is yes, it’s possible. At least a few people have done it already. So, you'll manage to bolt your 4th Gen center console into the 2nd Gen RAM successfully. Even though making it look perfect may be an issue. That’s because the 2nd Gen center console cup holder measures about 24.2-inch long. On the other hand, the 4th Gen center console appears a bit shorter. So, how does the swap happen?
How to Install A 4th Gen Console Into 2nd Gen RAM
You’re really determined to make your 2nd Gen Dodge RAM truck new by doing the various modifications. That includes the installation of a 4th Gen RAM center console. You can purchase the new center console online. Or you can buy it from your local junkyard for as low as $25 if you don’t have a lot to spend currently.
Either way, the most important thing, for now, is to fit it properly into your 2nd Gen RAM. It’s quite easy to install your new center console. The installation may differ a little bit depending on which year your 2nd Gen RAM truck is. For a 2001 RAM truck, all you need to do is to bolt your new console into the original metal brackets.
The brackets come from the bottom and up behind the plastic piece of the console. They then extend across the console. There are two bolts. One attaches the metal bracket to the back of the console and the other one to the side. Keep the original metal bracket and the top of the console will bolt right up between the driver and the passenger seat. You don’t need to drill anything. The new console will come with bolts somewhat threaded into it, which will help to attach the console to the original metal bracket.
Your 2nd Gen RAM center console may not have the various outlets/ports that the 4th Gen console has. This means you’ll not need to deal with wiring, which can make things difficult. You’ll just hide the wires of the new console underneath the seats. You can put them up and running later.
Can You Install A 4th Gen Dodge RAM Center Console Into 3rd Gen RAM?
It’s possible to replace your 3rd Gen RAM center console with a 4th Gen console. You may have also done several searches on the web and discovered that not many people have done this. But the process is simple and anyone can do it. In fact, the entire process will take you 30 to 45 minutes to complete.
How to Install A 4th Gen Console Into 3rd Gen RAM
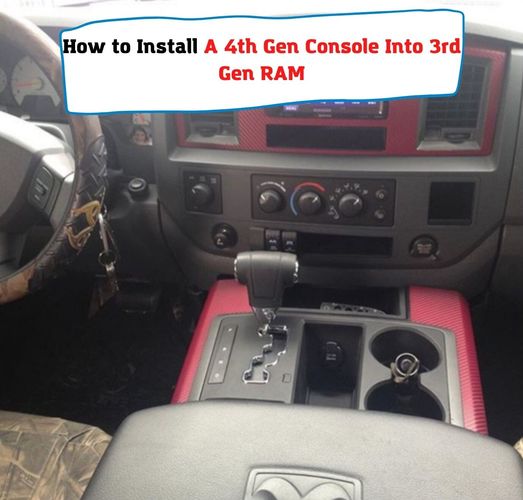
The two studs on the back should line up excellently with the mounts on the rear. The only problem should be the fronts, which are likely to be a bit far forward (about an inch). All you need to do is set the console in place and mark where the holes need to be in the front. You’ll then pull it back out, drill two holes using a unibit.
After the drilling, bolt in the front, and it will be done. The next step will be dealing with the wiring. Let’s break this down into steps:
Step One: Remove the two Phillips screws that hold the back vent cover onto the back of the console (this may not apply to a non-mega cab truck).
Step Two: Locate and remove all the rear console screws in all the corners (This step doesn’t apply to an automatic vehicle).
Step Three: Remove the lower console (rubber cup-holder). Also, remove the three 8mm bolts, pull up the plastic and the whole thing should be able to come out without a problem. Some tabs will just unplug by themselves once you pull the console up.
Step Four: (Applied for automatic vehicles) If your vehicle has rear air, pull back the air vent lip to disconnect it from the vent lip in the front. It’s here that you’ll see the four console bolts. Remove those nuts using a 13mm box/open wrench
Step Five: Extract the 13mm nut under the passenger seat in front of your console using the same box/open 13mm wrench. You can also utilize a 1/4inch socket wrench.
Step Six: Once you have removed all the four nuts from the console, then the next thing will be the little black straps holding onto the seatbelts. Remove the seatbelts from the straps on both ends. You can now lift and remove it. If your truck is an SXT, you’ll not find any power outlets in your center console, which means you won’t have to deal with any wires. But, other trucks may have some power sources to disconnect after lifting the console.
Step Seven: (Only applies to trucks with rear air vent. So, you can skip the step if yours doesn’t have it.) The vent path at the stock console bottom includes 4 clips holding onto it. So, pull these clips up. You can even break them if you have to. After that, remove the vent out of the stock console.
Step Eight: As mentioned, a 4th Gen console will most likely come with a USB outlet, AUX outlet, and 12V power outlet. But your 3rd Gen console will probably not have any of these. In that case, you can just tuck these outlets under the passenger seat and hook them later when you can. In other situations, many aftermarket radios come with an AUX outlet on the back. That means you may not even require worrying about this port. If yours have all the outlets, you’ll have to take more time to match the wires. Some wire diagrams can help you know which wire goes where.
Step Nine: (The step doesn’t apply for trucks without rear air) Place the air vent console pieces and fix the front to the front air vent port. You don't need to mount it – just place it there provided it’s attached to the front port.
Step Ten: Your new 4th Gen console will probably come with four new nuts threaded into it. So, remove them if your console is like that. First, get the rear studs through and then guide the studs on the front close to the front holes. You may also start with the rear stud but that may not go through well. After that, thread the nuts into the studs. Tighten them well so that the console is solidly fixed.
As mentioned, the new center console comes without a space for a rear air vent cover. But you can survive without it. Moreover, you can remove the vent piece and stuff it with anything. That should make the front vent more powerful. Put the lower console area back and all is well. You now have a nicer and cleaner look with your new center console.
It will also be more comfortable driving your 3rd Gen RAM with a newly installed 4th Gen RAM center console. You’ll have an extra cup holder and a place to put your phone or other stuff there. Hopefully, the shifter won’t get too close to your new console. In reverse, however, it should get to about one-inch closer, which isn’t a big deal.
Final Words
Many modifications can modernize and make your 2nd or 3rd Gen Dodge RAM truck more functional. One of these mods includes the installation of a new 4th Gen RAM center console. That won’t only improve your vehicle’s functionality in the cabin but will also make your ride more comfortable.
The question was whether it’s possible to install a 4th Gen Dodge RAM center console into a 2nd or 3rd RAM. From this post, you now know that it’s possible. You also know how to go about it. The trickiest part of the process is getting the ports up and running. But, so far we hope that you found the help you needed to do the swap successfully.
About the authors
The CarAraC research team is composed of seasoned auto mechanics and automotive industry professionals, including individuals with advanced degrees and certifications in their field. Our team members boast prestigious credentials, reflecting their extensive knowledge and skills. These qualifications include: IMI: Institute of the Motor Industry, ASE-Certified Master Automobile Technicians; Coventry University, Graduate of MA in Automotive Journalism; Politecnico di Torino, Italy, MS Automotive Engineering; Ss. Cyril and Methodius University in Skopje, Mechanical University in Skopje; TOC Automotive College; DHA Suffa University, Department of Mechanical Engineering


Add comment