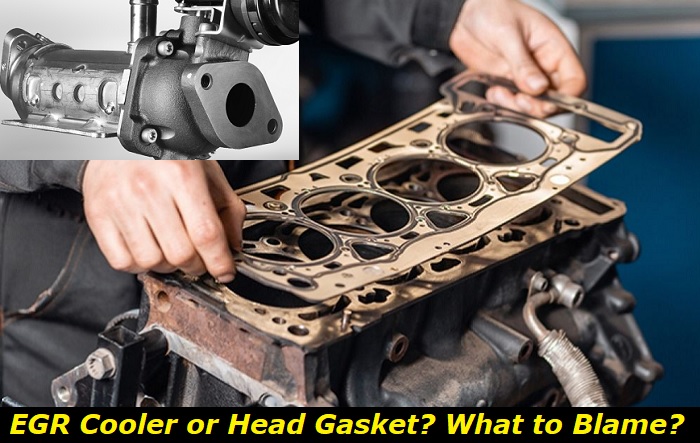
Between a blown EGR cooler or head gasket- you probably do not want the latter. However, diagnosing your engine issue between the two is so close. You would probably cross your fingers longer, wishing the problems are not the head gaskets.
Internal engine problems highlights
- Level of importance:High
- Commonreasons:Mileage, poor maintenance, improper use, physical damage
- DIY inspection:Possible but may be complicated
- DIY repair:Possible, in some cases
- Price for repair:$250 - $1,500
- Can you drive?Depends on the issue
- Ways to fix:Locate the problem, outline possible fixes, replace or repair the worn-out parts

Why is it confusing to diagnose a blown EGR cooler or a blown head gasket?
All these confusions are because of their similar symptoms: white smoke on the tailpipe, bubbles in the cooling system, substantial coolant loss, and engine overheating. When your vehicle has these symptoms, finding the cause of the problem becomes more challenging.
1) White smoke or steam at the exhaust
The EGR cooler is supposed to cool down the combustion temperature by diluting the air-fuel mixture. It is also responsible for keeping the engine cool. However, if you see the smoke coming out of your tailpipe, it could either be because of a head gasket failure to maintain a seal or a damaged EGR cooler.
The smoke you see is steam caused by boiling coolant or water. When your head gasket does not maintain a seal or the EGR cooler cracks, the coolant mixes or seeps with the exhaust or combustion chamber. You will be losing more coolant. And the coolant mixture may go through the intake, which is just below the EGR cooler, and into the cylinders before it comes out in the tailpipe that looks like smoke.
Once it does, the worse is about to happen.
2) Bubbles in the cooling system and radiator
The coolant system comprises a network of leak-free hoses that pump coolant and prevent overheating. However, once the air has penetrated the coolant system, it forms air pockets or bubbles that cause blockages and eventually overheating. These air pockets came from the combustion gases seeped through the cylinder and into the cooling system.
Bubbling in the degas bottle means the pressure is increasing and that air pockets are forming in the coolant system. If a blown head gasket caused bubbling, the pressure in the cylinders moved to the coolant system.
3) Low coolant levels
This symptom is pretty straightforward. If you have noticed the coolant reservoir is starving from coolant, it could either be a blown EGR cooler or a blown head gasket. If you can't see any leaks in the coolant system but suffer significantly low coolant levels, the problem is more likely in the EGR cooler. But if you have coolant leaking and found it under the exhaust manifold, you probably have a broken head gasket.
4) Overheating
Engine overheating can arise from many issues. It can be a problem in the EGR cooling system, or the heat cannot escape properly. This problem may likely be low coolant levels, EGR hoses blockage, or a coolant leak.
How to Diagnose if it is an EGR cooler or a head gasket problem?
Looking at the symptoms above, any truck owner would cross their fingers and prefer to only have the problem on the EGR cooler. However, you can try many ways to test a broken EGR cooler before attempting to disassemble your engine block heads. Many owners would test the EGR first.
1) Bubble Test
A bubble test is the simplest way you can do it. It is a simple pressure test kit containing a cap with a hose. The test intends to see if there's a leak in the EGR cooler.
How to perform the bubble test?
To do the bubble test, remove the cap of the degas bottle (coolant reservoir) and replace it with the coolant bubble test cap.
Get a transparent bottle with clear water and place the hose end of the bubble test kit. Locate your VGT Solenoid on the turbocharger. This actuator relaxes and relieves the EGR cooler from any back pressure from the turbo when removed.
To start the test, run your engine with the solenoid connected. And observe the bubbles in the water inside the bottle.
Observe it until the water stabilizes. Next, remove the solenoid from the turbocharger- to relax the turbo veins and EGR from back pressure and see if the water produces bubbles again. You can do this multiple times until you conclude that the water does not bubble without the solenoid.
Analysis
If the water does not produce bubbles when the solenoid is not connected, our initial finding would be a blown EGR cooler.
If the water still bubbles without the solenoid, our initial findings would be a blown head gasket.
2) Combustion Leak Test
A combustion leak tester is a kit aiming to test the level of combustion gases present in the coolant system. Combustion gases should not be seeping into the coolant system. It composes of a transparent tube glass, a cap, and a nose cone on the other end. It uses a specialized fluid that changes color or reacts once it detects the combustion system in the coolant system.
How to perform the combustion leak test?
To perform the test, park your truck in a well-ventilated area.
Take the pressure-relief cap of the degas bottle. Ensure you have drained at least two to three inches of coolant from the bottle opening.
You could either set the transmission in park or the engine in parking brake mode. Run the engine until the engine temperature normalizes. The thermostat should be open. Press the nose cone into the degas bottle opening, squeeze and release the suction cap while idling to draw off radiator gases from the specialized liquid in the tester. Do this for about a minute. The fluid is blue. Observe the fluid if it turns yellow.
Be careful not to touch the coolant from the tip of the nose.
Analysis
If the blue fluid turns yellow, you have combustion gases in the coolant, which is not good news. A combustion leak means you must have a blown head gasket.
If the fluid remains blue, the problem could be in your EGR cooler since there are no combustion gases present.
3) EGR Cooler Pressure Leak Test
An EGR cooler pressure tester kit contains a hose, a pressure gauge, a hose, and a clamp. This tester aims to test the back pressure of the EGR cooler and see if it has leaks and pressure drops. However, this test will require you to remove your EGR cooler.
How to do the EGR cooler pressure test?
- After removing your EGR cooler, connect the kit.
- Start with the adapter, the hose, and the pressure gauge.
- Fasten it with a hose clamp. Shut off the valve.
- Apply a pressure of 50 psi.
- After twenty minutes, document the air pressure.
Analysis
- If the pressure remains, the engine coolant is still good to use.
- If the pressure drop measures more than 20 psi, replace the EGR cooler.
- If your second test results in 0.5 psi and the EGR cooler has no leaks (through the bubble test), you must replace the EGR cooler.
4) Visual Inspection on Head Gasket
Check under the oil cap.
Here's an easy way to see if your truck has a blown head gasket. Remove your oil filler cap and check if some thick, frothy mixture filled up under the cap. The substance accumulated under the cap is coolant mixed with engine oil that has seeped through the blown head gasket. Contaminated engine oil can no longer protect the engine.
Check for an anti-freeze leak.
The anti-freeze circulates through the radiator and other parts of the engine to keep it cool.
Coolant leaks can sometimes leave puddles of light-colored residues under your car. And usually, it comes with an oddly sweet scent. You can smell it after turning off the engine. After driving your vehicle, when it has warmed up completely, park it in a clear or dry driveway. See if you can still smell the anti-freeze and locate where the puddles are coming out.
Check these places: the radiator cap, hose ends, and the radiator.
5) Compression test on Cylinders
After testing pressure on the EGR cooler, check the compression on the head gasket to see if no pressure changes in the head gasket.
However, you must do it on each cylinder by removing the spark plugs. Do it one by one on each cylinder and take note of the readings. Make sure to reset the gauge to zero every time. If there's considerable pressure loss in two side-by-side cylinders, you must have a blown head gasket.
While there are other problems with these reading results, they should come with other symptoms mentioned above.
Final Thoughts
You can already conclude the problem is in the EGR cooler if your bubble tests say there is no leak in the EGR cooler and a failing combustion leak test. In most cases, replacing EGR coolers should stop the symptoms like white smoke, low coolant levels, and overheating.
Some people delete their EGR coolers, which is not advisable.
We recommend testing for EGR cooler problems first before disassembling anything in your engine. But most importantly, never drive with an antifreeze leak, low coolant levels, or overheating engine.
About the authors
The CarAraC research team is composed of seasoned auto mechanics and automotive industry professionals, including individuals with advanced degrees and certifications in their field. Our team members boast prestigious credentials, reflecting their extensive knowledge and skills. These qualifications include: IMI: Institute of the Motor Industry, ASE-Certified Master Automobile Technicians; Coventry University, Graduate of MA in Automotive Journalism; Politecnico di Torino, Italy, MS Automotive Engineering; Ss. Cyril and Methodius University in Skopje, Mechanical University in Skopje; TOC Automotive College; DHA Suffa University, Department of Mechanical Engineering


Add comment