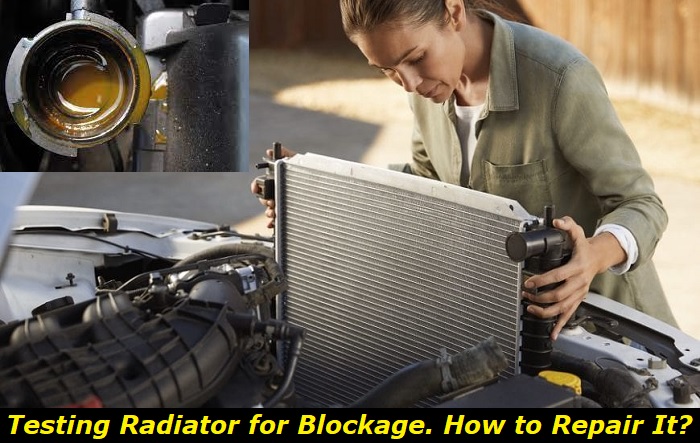
When it comes to a vehicle's cooling system, the radiator plays an important role as its central component. Why? Because it's responsible for regulating your engine's temperature and preventing it from overheating to avoid complications.

Ways to Test the Radiator for Blockage
There are two ways to test your radiator for blockage. Choose one that's suitable for your current situation:
- Warm Engine Radiator Test
If you suspect that there's something wrong with your radiator while driving outside, stop the car and let it rest for a few minutes. Then, open the hood of your car and check for any obvious signs of damage.
Once the temperature of the engine normalizes, carefully feel around the outside fins of your radiator core. Be careful to avoid touching the top surface of the radiator, you can burn yourself.
What you're trying to check is for cold spots on your radiator. If there's any such spot, this is a clear indication that you have a blocked radiator.
- Cold Engine Radiator Test
For vehicles resting overnight or for a long period, start with removing the radiator cap. Make sure that the engine is completely cold before doing this.
Then, fire up the engine and let it run for a couple of minutes. With the use of a flashlight, check the fluid inside the radiator for signs of discoloration or still movement. If either of these is present, this indicates that you have a clogged radiator.
For those stranded at night or who have no flashlight on hand, turn off the engine. Then, listen closely for a sound that resembles boiling liquid. This is also a sign that you have a clogged radiator.
How to Repair a Radiator with Blockage?
If you're certain that your radiator is suffering from blockage, bring your car to the nearest auto shop and have a professional mechanic resolve the issue for you. However, if you have some knowledge in this area or you wish to do it yourself and save some money, here are the steps to do so:
1) Make Preparations
Before you start doing anything to the radiator, you first need to prepare the tools and equipment that you will need. This helps keep you organized and tidy throughout the entire process. The following are the things you need to prepare for this project:
- Safety Goggles
- Gloves
- Mask
- Flushing Solution
- Distilled Water
- Bucket
- Coolant
- Pliers
- Screwdriver
- Old Plastic Bottles
- Funnel
2) Let The Engine Cool Down
Make sure to let the engine cool off for a few hours. If possible, park your car in a shaded area as well.
This is to keep you safe while working. You don't want to accidentally burn yourself.
3) Drain Out the Old Coolant
The next step is to drain out the old coolant. To do this, place a bucket underneath the radiator's drain petcock. Keep in mind that a radiator can usually hold between two and three gallons of coolant. So, use a bucket that can hold at least that much.
If your radiator doesn't come with a drain petcock, detach the radiator hose instead and direct it to the bucket. Use a screwdriver or a pair of pliers to help you detach it.
Then, remove the fill cap on top of the radiator and wait for the old coolant to drain out. When you do this, check if the old coolant is flowing out. If not, use a thin piece of wire or something similar to poke into the radiator or hose to help dislodge the blockage.
Afterward, drain the reservoir tank of coolant as well. Detach the reservoir hose and direct it to the bucket as well. Once there's no more old coolant to collect, reattach all the hoses.
4) Pour The Flushing Solution
Next, prepare the flushing solution. Follow the instructions that come with the product when diluting it. Use distilled water as well to prevent minerals and other impurities from corroding your radiator.
For those that don't have a flushing solution available nearby, you can use a homemade solution instead with baking soda and water. Simply add five teaspoons of baking soda for every liter of water that you will use.
After preparing the solution, check if you properly sealed the drain petcock and reattached the hoses. Then, pour the solution into the radiator before closing it with a fill cap.
5) Let The Engine Run
Then, it's time to turn the engine on to allow the flushing solution to circulate and get rid of the contaminants inside the radiator. While running the engine, you can also set the heater to its highest output for better results. However, make sure to keep an eye on the temperature gauge, as you don't want the engine to overheat.
Let the engine run for at least ten to fifteen minutes, or until it gets too hot. Running the engine any longer than recommended can damage it.
6) Get Rid of the Contaminants
After running the engine for the required amount of time, let it cool down first until it's safe to touch. Then, drain the radiator by repeating the same process you did earlier.
Additionally, you can dispose of all the liquid in the bucket by using old plastic bottles. Store the liquid inside and seal each bottle correctly to prevent harming the environment.
7) Rinse the Inside of the Radiator
To make sure that there's no contaminant left inside, rinse down the inside of the radiator using distilled water. Again, you don't want to corrode the radiator.
If the water coming out is clear and flowing nicely, then you have successfully unclogged your radiator. But if there are still traces of contaminants in the water or if it's taking a while for the water to come out, repeat the previous steps.
8) Replenish the Radiator with New Coolant
Next, replenish the radiator with new coolant and distilled water. Use coolant that's suitable for your car. Check the car manual to see which coolant works best, or seek advice from your local car dealership.
When mixing the coolant with distilled water, make sure to use half of each. Or, you can purchase a pre-diluted solution on the market.
9) Fire Up the Engine Once More
Finally, it's time to fire up the engine once more. Like you did previously, turn on the heaters to get better results. Run the engine for at least ten to fifteen minutes.
Doing this helps circulate the coolant throughout the system and eliminate any air pockets. And as mentioned earlier in this process, turn the engine off when it starts going above the normal temperature.
Afterward, let the engine cool off before checking the radiator to see if it needs more coolant. Also, check the car manually when it comes to getting rid of excess air in the system.
What Causes the Blockage and How to Avoid Them?
If you're wondering why your radiator has a blockage in the first place, there are a few common reasons why. The following are the most likely causes of blockage inside your radiator:
- Poor Maintenance
- Old Coolant
- Dirt/Debris Buildup
- Rust Accumulation
To avoid these issues, it's always best to take care of your car. Never skip out on your yearly car maintenance. And, make sure to change the radiator fluid every two years for silicate coolants and every five years for those using an extended drain coolant.
If you tend to use your car more than the average person, you will need to bring it to a local auto shop much earlier. To describe it in miles, you need to let a professional mechanic inspect your car after it has accumulated 50,000 miles. For the radiator fluid, you need to replace it every 24,000 to 36,000 miles.
However, those living in areas with extremely hot temperatures will need to change the radiator fluid much earlier. That's because the outside temperature affects how quickly your radiator fluid evaporates. Usually, you need to replace your radiator fluid annually or every 12,000 to 15,000 miles if you live in such areas.
Additionally, maintain the hoses underneath the vehicle. Random debris like rocks, pebbles, cans, and other similar objects can harm and lacerate these hoses, causing a leak. You can repair these by using insulating tape or replace them with brand-new parts.
Conclusion
When your engine starts to overheat, there's likely a blockage inside the radiator. So, don't ignore it and run some tests to find out. If you're not too confident when it comes to verifying whether or not there's a blockage, bring your car to the nearest auto shop.
From there, you can either have their mechanic fix the problem for you or you can do it yourself at home to save some money. Either way, it's best to take this problem seriously to avoid further complications with your engine in the future.
About the authors
The CarAraC research team is composed of seasoned auto mechanics and automotive industry professionals, including individuals with advanced degrees and certifications in their field. Our team members boast prestigious credentials, reflecting their extensive knowledge and skills. These qualifications include: IMI: Institute of the Motor Industry, ASE-Certified Master Automobile Technicians; Coventry University, Graduate of MA in Automotive Journalism; Politecnico di Torino, Italy, MS Automotive Engineering; Ss. Cyril and Methodius University in Skopje, Mechanical University in Skopje; TOC Automotive College; DHA Suffa University, Department of Mechanical Engineering


Add comment