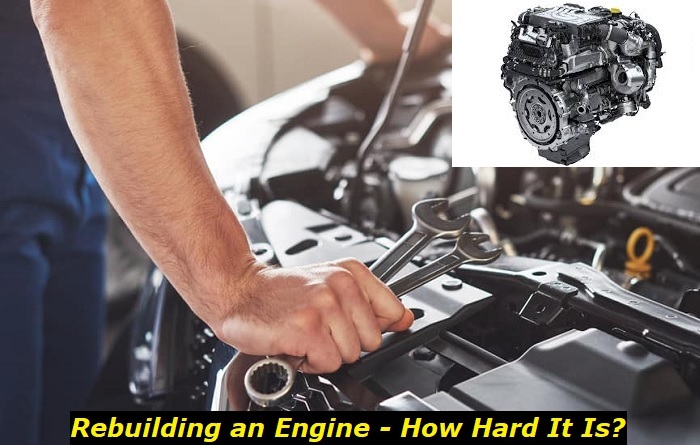
Rebuilding an engine is not for the fainthearted. It is an uphill task hard for people who are not advanced or intermediate DIYers. Anyone looking to breathe new life into their vehicle's most vital component is faced with the choice of buying a new engine or rebuilding their old one. If you are tempted to begin an engine-rebuilding project, it is wise to tread cautiously.
Engine upgrades highlights
- Commonsystems:fuel supply, air supply, exhaust, software
- Average prices:$500 - $6,500
- Average waiting time:1 - 21 days
- Commonreasons:higher power and torque
- DIY mods:just minor things, usually plug & play
- Level of satisfaction:medium
What Does an Engine Rebuild Entail?
Rebuilding your internal combustion engine will require you to separate and inspect all the components. You will then have to replace any parts that show signs of wear and tear with high-quality brand-new components. When you complete the rebuild, your engine will be good as new. Replacing pistons, valves, seals, and bearings is usually a high priority. It is also good practice to replace gaskets, O-rings, and plastic or rubber components.
Tools and Items Necessary for an Engine Rebuild
Rebuilding your engine will take more than just your average DIYers tool kit. You will need to purchase a long list of equipment. If buying all these items is not your cup of tea, you can find out if your local hardware store rents out tools. It is generally advisable to rent what you can and rent.
You will need the following:
- Basic hand tools set
- Flashlight
- Engine rebuild kit
- Engine stand
- Engine hoist
- Electric drill
- Engine assembly lube
- Air compressor
- Air hose
- Blowgun
- Brass punch
- Cylinder bore honing tool
- Camshaft bearing tool
- Cylinder bore ridge reamer
- Fender covers
- Masking tape
- Jack stands
- Permanent marker
- At least two oil drain pans
- Rod journal protectors
- Piston ring compressor
- Sandwich bags (to safely store and sort parts)
- Silicon gasket maker
- Torque wrench
- Timing gear puller
- Water displacement lubricant
- Wheel chocks
- Service manual
Once you gather all these tools, you are ready for the next step.
Research Your Engine's Removal Procedure
Although all internal combustion engine work on the same principle, they are not installed in the same manner. Consulting your service manual will provide the exact procedure to follow. This is much better than the type of generic steps detailed below. If you do not have a service manual, purchase one online.
Drain Your Vehicle's Fluids
You must raise your vehicle's front from the floor and then lower it on your jack stands. Next, set your parking brake before placing wheel chocks beneath your rear wheels. Cover your fenders and drain your engine oil and coolant into separate drain pans.
Prepare Engine for Removal
Remove all plastic covers, tubes (air intake), and filter housings to ensure easy engine removal. Place all components into a sandwich or ziplock bag. Label the components using masking tape and a permanent marker.
After draining all your fluids, remove your radiator from the vehicle. This will involve undoing the radiator hoses and any lines (transmission) wherever necessary. Once the radiator is free, set it aside to prevent damage during the engine removal.
Next, disconnect the heater hoses, battery, starter, harnesses, and connectors. Using your flashlight, check the firewall and underside to ensure you haven't missed any connectors. After disconnecting all the connectors, place the harness aside.
Remove your starter and unbolt the exhaust manifolds from the downpipes and cylinder heads. Consult your service manual to determine what your engine can remove without unbolting the exhaust manifolds. The next step for a car with air conditioning should be removing the belts and unbolting the compressor. It is advisable to leave your compressor attached to your air conditioning lines to avoid refilling the refrigerant.
You will now need to unbolt the transmission bell housing to free your engine. If your transmission is not secured to the vehicle by a mount or cross member, support it using a jack before removing the bolts on the bell housing. Store all hardware removed in labeled sandwich bags.
Removing Your Engine
Position the engine mount above your engine. Check whether your engine has brackets or hooks to attach hoisting chains easily. Some engines need a bolt and washer threaded through the chain links. Whatever the case, ensure the chains are securely connected.
After securing the engine to the house and removing all transmission bolts, unbolt it from your motor mounts. Leave the mounts attached to your whenever possible. Your engine is now ready for removal.
Before lifting your engine from the car, ensure that no hoses or connectors are still connected. All the hardware attached should also be removed. Getting a second pair of hands for this step is also advisable because the engine is quite heavy and requires help to maneuver. Lift your engine slowly and maneuver it from the car.
Mount Your Engine on the Engine Stand
The next step is positioning your hoist over the engine stand. Next, secure it to your stand using nuts, bolts, and washers. Ensure you use high-quality bolts that securely hold your engine's weight without breaking.
Disassemble Your Engine
Remove any engine belts or accessories that may still be attached to the engine. Next, remove your distributor, wires, oil pump, crankshaft pulley, water pump, power steering pump, alternator, and all pulleys and accessories. Ensure your store the components in labeled sandwich bags.
The second step of this process requires you to remove your oil pan, intake manifold, timing cover, flywheel or flexplate, valve covers, and rear engine cover. Put a drain pan under your engine to collect any residual coolant or oil in these components.
Disassemble your cylinder heads' valvetrain, exposing the pushrods and rocker arms. Remove the rocker arms and pushrods. Inspect them to ensure they aren't bent or worn out at contact points. After removing the pushrods, proceed to remove the lifters and lifter retainers. Similarly, inspect your valve train components. Replace all components that seem worn out or damaged.
Next, remove your cylinder head bolts from the outside to avoid warping the head when torque is released. Remove your sprockets and timing chains. If your sprockets prove tough to remove, using a timing gear puller will make the job easier. You can now remove your camshaft.
You will then need to rotate your engine 360 degrees to enable the removal of the piston caps. Ensure you store them together in a labeled sandwich bag. After removing the caps, use rod journal protectors for every rod stud to ensure they do not scratch or score the walls during removal.
After removing the end caps of the connecting rods, use a cylinder ridge reamer to clean the carbon buildup from each cylinder top. Pull out the pistons one at a time while taking care not to damage or scratch the walls.
The final part of your engine disassembly is removing the crankshaft. You will need to rotate your engine to remove your crankshaft bearing caps, the crankshaft, and the main bearings. Examine your crankshaft journals for signs of scoring, scratching, oil starvation, or overheating. It is advisable to replace a damaged crankshaft. Alternatively, you can take it to a local machine shop for advice on whether it can be repaired.
Prepare Your Engine Components for Reassembly
Clean all the components, including the engine block, and dry them with compressed air. Hone your cylinders lightly by mounting the tool on the drill; spray the walls with the water displacement lubricant after honing. Next, remove and replace all your freeze plugs and install new piston rings. Use your camshaft bearing tool to install your new cam bearings. Apply enough assembly lube on every bearing.
Reassembling your engine
Turn your engine to reinstall your main bearings, crankshaft, and caps. Ensure the bearings and journal are well lubricated. Bearing caps should be installed hand-tight-torque down the caps to the specifications and in the sequence outlined in your manual. Rotate the crankshaft by hand to ensure it is smooth and doesn't bind.
Install new bearings on your piston rods and install them into your engine. Use your tool for cylinder ring compression before lowering the pistons in the cylinders, then to the crankshaft journal. Next, you should rotate your engine and put in your rod end caps to the pistons.
Lubricate the crankshaft journals and cam lobes before installing them. Ensure you do not score or scratch any bearings. Next, install your timing chain, crank, and cam sprockets. Clock your sprockets per your timing kit or service manual.
Hand rotates your crankshaft to verify all components are correctly installed before putting in the rear engine cover and timing chain cover. Replace any gaskets and seals on your engine covers. Ensure you replace any gaskets and seals pressed into your engine covers.
Rotate your engine to install the oil pan and gasket. Next, install the new head gasket, head, and head bolts. Torque the bolts as specified in your manual. Reinstall your valve train, beginning with the lifters, guide retainers, pushrods, and rocker arms. Lube the components before installation to prevent excessive wear. Install the valve, rear engine, and intake manifold covers when done.
Finally, install your water pump, exhaust manifolds, flexplate, and accessories in the reverse order of removal.
Reinstalling and Testing Engine
Mount your engine on the hoist and return it to the vehicle in reverse order of removal. Reconnect your hoses, connector, and hoses, then top up your engine fluids. Voila! Your engine is now ready to test. Check your service manual for any testing specifications after a rebuild, and take the car for a spin to enjoy the fruits of your hard labor.
About the authors
The CarAraC research team is composed of seasoned auto mechanics and automotive industry professionals, including individuals with advanced degrees and certifications in their field. Our team members boast prestigious credentials, reflecting their extensive knowledge and skills. These qualifications include: IMI: Institute of the Motor Industry, ASE-Certified Master Automobile Technicians; Coventry University, Graduate of MA in Automotive Journalism; Politecnico di Torino, Italy, MS Automotive Engineering; Ss. Cyril and Methodius University in Skopje, Mechanical University in Skopje; TOC Automotive College; DHA Suffa University, Department of Mechanical Engineering


Add comment