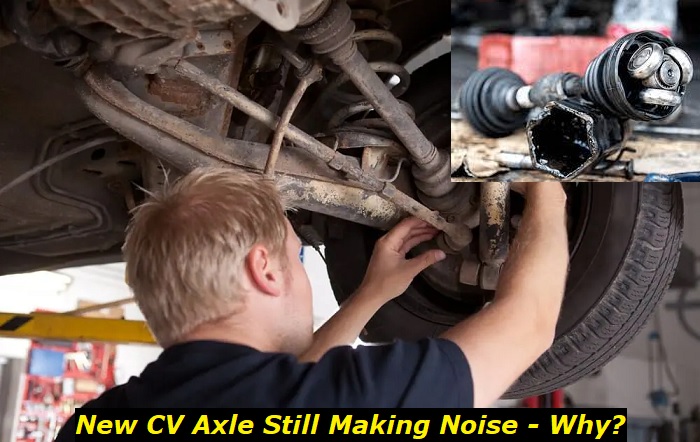
Every front-wheel-drive car has a CV axle attached to each end of the driveshaft. The CV axle is an integral part of the suspension system that allows you to drive comfortably. When this component faults, it makes noise while driving straight or making turns. A faulty CV axle makes driving quite difficult and uncomfortable.
Drive shaft problems highlights
- Level of importance:high
- Common reasons:old drive shaft, accidents, broken rubber protection
- DIY inspection:possible
- DIY repair:impossible
- Average price in shops:$250 - $500
- Average time:2 - 3.5 hours
- If ignored: no-drive, unpleasant sounds, hub wear

8 Reasons Your Newly Replaced CV Axle Is Making Noise
- Axle Alignment
Before a CV axle replacement, it is essential to match the replacement unit with the original physically. Sometimes, they may appear to be a match when they are not. Also, a replacement unit may not appear the same, but as long as it physically matches the original CV axle, it will function properly.
You should pay close attention to the overall compression length and inner and outer joints (stub length, spline count, and seal diameters).
If the sub-frame falls out of alignment during the replacement process, the inner and outer joints' geometry will be tempered with. This may affect the outer CV joints by exceeding the maximum operation angle. Additionally, the inner plunge joints may bottom out.
Axle misalignments are more pronounced when the replacement unit is not made with the precise specifications of the original unit.
It is also essential to know the vehicle you drive. Modified vehicles have their operational angels altered during modifications. Some automakers like Honda have special CV axle replacement procedures. Honda has a centering process that requires you to loosen the motor mounts during a CV axle replacement process.
If there was an axle misalignment during the installation process, it is one possible reason your vehicle is still producing the noises.
- Lack of Lubrication
If you are doing a CV axle replacement job, you should close the process by adding grease to the CV joints. If the joints aren't well lubricated, the CV axle will not function properly, which is why you hear the noise when driving straight and making a turn. These noises become louder when you turn in speed.
Friction between metal components produces squeaking noise, which can be significantly reduced using lubrication. Grease is the lubricant for CV axle joints. When there is insufficient grease inside the CV joints, the friction build-up contributes to the excessive noise you hear from the inner CV joints when you make turns.
One possible explanation for losing CV joint lubrication is if you just replaced the CV axle and forgot to apply enough grease.
- Broken CV Boots
There are different options to choose from when replacing the CV axle. You can replace the whole axle assembly with its components, like the boots pre-installed or just the CV axle. If you choose to use your existing CV boots, if they are faulty, you may experience CV axle noises even with the brand-new unit.
The CV boots could be damaged in one or two ways: torn or cracked. When the CV boots are faulty, grease will leak, which could cause a faster accumulation of dirt around the CV joints or loss of lubrication. These two harmful effects will result in squeaking noises produced by the metallic components of the CV joints.
Broken CV boots also give way to debris, which could quickly damage the CV joints. If you just replaced the CV axle and notice grease from the CV boot, it means your boots are torn or cracked.
If the CV boots are slightly damaged, you will notice the presence of grease within the interior of the wheel rim. However, if the damage is critical, which you should have noticed before replacing the axle, you will see grease within the drive wheel area.
Grease leaking due to faulty CV boots could enter various parts of your vehicle, including the chassis. All these will lead to CV axle noises. The noise increase as you drive fast and make turns at high speed.
- Loose or Broken CV Boot Clamps
As mentioned earlier, CV axle lubricant is kept in place by CV boots. These CV boots are not welded or bolted into the CV axle; they are kept in place by CV clamps. Loose or broken boot clamps could lead to the noises you hear when accelerating or making sharp turns. Improperly installed CV joints could loosen CV clamps.
When you drive with loose or faulty CV boots, debris from the road can get into the CV joints. This dirt causes the inner CV joints to clunk, generating the noises you hear from the inner CV joints.
Loose CV boots also lead to grease leakage, which eventually causes a lack of lubrication. As seen earlier, the lack of lubrication is why your newly replaced CV axle is making noise.
- Wrong CV Axle or Bad Replacement Job
Sometimes, replacing the CV axle with the wrong unit could happen. When placing the order for a CV axle replacement unit, it is crucial to be precise with the specs. Sometimes, ordering a CV axle for a manual transmission vehicle when yours is automatic could be why your newly replaced CV axle is still making noise. The difference is always in millimeters, but it could be why the plunge joint is too shallow or too deep.
If the new axle is even slightly longer than the original, it can cause the plunge joints to bottom out and damage the bearings, the surfaces of the balls, or the races. If the axle is short, it could retract from the plunge joint under certain conditions.
- Vehicle/ Transmission Alignment
Check the transmission condition if you just replaced the CV axle, but it is still making noise. If you notice bent components, it could be the reason the newly replaced axle is still giving you headaches. Bent components could cause the range of motion of the CV or plunge joint to change, which is a possible cause of CV axle noise.
- Excess Lubrication
As mentioned earlier, a CV axle replacement job should be closed with the application of grease. Be sure to add just enough grease to avoid giving it too much of it. Internal friction of CV joints generates heat. Heat can also come from the brakes and the engine. Excess heat causes the air and grease inside the CV joints to expand, building up pressure.
The pressure produced from the forced expansion of the air and grease could forcefully push the CV boots off the body of the joints. Any of these faults could cause the new CV axle to make noise.
- Seals
One of the terrible mistakes technicians make when replacing the CV axle is failing to address the seals. Most seals have a lip and a spring that keeps the lip attached to the CV axle. Pay attention to the seals, after which you can take ample time installing the axle. Splines can damage the seals, leading to loss of lubrication.
The area where the bearings make contact with the seals is the most important. This area must be free of external damaging factors such as rust or dirt.
How to Get Rid of CV Axle Noise
How you deal with a newly replaced CV axle still making noise depends on the cause. In most cases, these noises occur because there was a lousy engineering job, you used the wrong CV axle, or fault parts weren't addressed. Once you notice a broken CV boot, for example, how fast you fix it will determine how much you will spend repairing the CV axle.
Replacement Cost of a CV Axle?
While it may sound cheap to fix a CV joint, replacing the entire CV axle assembly is highly advisable. If you choose to have a professional technician do the replacement job, expect to spend between $300 and $700 for the entire CV axle assembly.
However, if you have the technical know-how and the right tools, you can save a great deal of money by replacing the CV axle in your home garage. Depending on your vehicle model, you can spend between $75 and $200 on a new CV axle assembly.
Conclusion
Experiencing CV axle noise can be annoying, especially when you just replaced it. That's why you should know what could have gone wrong during or after the replacement process. Ensure that you order the correct replacement unit.
Additionally, if you are hiring a professional to do the job, ensure you get the right person. If you choose to do it yourself, ensure you have the right tools and use preventive measures before beginning the job. Check that you have applied parking brakes.
About the authors
The CarAraC research team is composed of seasoned auto mechanics and automotive industry professionals, including individuals with advanced degrees and certifications in their field. Our team members boast prestigious credentials, reflecting their extensive knowledge and skills. These qualifications include: IMI: Institute of the Motor Industry, ASE-Certified Master Automobile Technicians; Coventry University, Graduate of MA in Automotive Journalism; Politecnico di Torino, Italy, MS Automotive Engineering; Ss. Cyril and Methodius University in Skopje, Mechanical University in Skopje; TOC Automotive College; DHA Suffa University, Department of Mechanical Engineering


Add comment