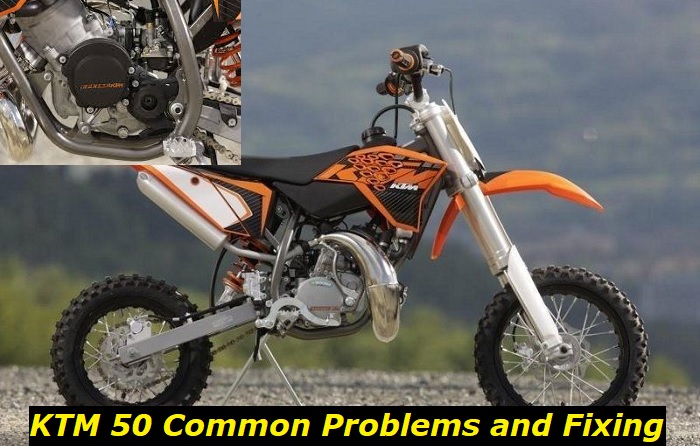
KTM 50 problems are common to a lot of users. Improper usage of the KTM 50 or bad exposure to dirt and too much oil to some components can cause wear of these affected parts. If you are having problems with your KTM 50 then you'll find this article useful for yourself.
The KTM 50 is a great bike and requires great care. It can most times wear unexpectedly due to oil leakage in some areas like the gasket, air boot, and even on the brakes. Dirt also can be a major factor that can cause this effect.
However, there are many reasons why your KTM 50 will malfunction or wear over time. An additional reason why your KTM 50 may malfunction can be due to lifespan and in another scenario, it may be due to poor maintenance and incorrect repair of the damaged part.

The KTM 50 problems are highlighted below alongside fixes for each of the problems. You do not need to visit the mechanic often once you have these in check. Follow closely as we show you some problems, how to avoid them, and also how to fix them when they occur.
KTM 50 Problems
Air Filter Servicing
The air filter can be a major cause of fault development in your KTM 50. Avoid riding the bike without an air filter since the dirt and dust can find their way into the engine and cause increased wear. If you already have your air filter in place, don't forget to clean it often to keep it in shape.
How to Remove the Air Filter
- Remove Seat
- Turn the ring at the end of the seat in an anti-clockwise direction to remove the seat.
- Remove Filter Cage
- Take out the cage covering the air filter without allowing the dirt to fall into the air boot
- Remove the Filter
The filter is a thick well-fitted foam lying on top of the air boot. Don't allow the dirt on it to fall into the air boot. You'll have to lift it off gently.
What The Air Boot Looks Like: The air boot is the large opening directly under the air filter. Once the air filter is out, the air boot becomes visible. It is dark inside and you need light to see beyond the outside of the boot. Get light to check the inside.
How to Clean the Air Filter
This part will be done in 3 simple steps. Follow the article carefully to see how.
Step 1:
Rinse the Air Filter. You need some warm water to rinse the air filter. Dip the air filter into a bucket of clean water for some seconds, then remove it. Mechanics commonly make use of petrol as a quick way of removing oil. Well, gasoline can affect the foam cells and glue, causing them to break and loosen the foam strips that join them together. It's safe to make use of water.
Step 2:
Remove the dirt. Now that you've taken oil out of the air filter, you will need to remove the dirt too. Put the air filter into a bucket or container or zinc (most preferably) of very warm soap water. Use liquid soap for this (either one for the dish or laundry). Very important. Soak for 5 to 10 minutes. This time is enough to make the dirt go out.
Step 3:
Remove soap. Get close to a tap of clean running warm water; place the filter under the tap to allow the water to run through it to remove the soap.
Inspect the air filter until there is no dirt left on it
Leave the filter to dry for 24 hours approximately. This should be done in a separate container in your workshop or outside of your house due to the strong smell of the oil. You sure don't want to be causing a little air pollution in your house.
After the filter is dry, take a zip lock bag or an alternative in your home. Whatever thing you want to use should have a good seal and also have the texture of a nylon bag (disposable one).
Add Air Filter Oil
You pour some of the oil into the bag (enough to cover the air filter). Just a little bit of the oil is enough for the air filter. If it isn't enough then you can add a little until you get the right quantity you need.
Knead the bag
After pouring oil, close the bag then hold tightly to force air out of the bag. Now you have just the foam in the bag. Knead continuously for the entire air filter to be covered in oil.
Remove Air Filter from the bag
Open the bag and take out the filter. Discard the bag and squeeze the excess oil out of the filter. Squeeze until there is no physical trace of oil on the filter.
Avoid wringing the filter. This can affect the shape of the filter. Just squeeze in one hand until the excess oil is out.
Leave Air Filter for some time
Take out a new zip lock bag and put the filter inside. Seal up for some hours and then remove. Dispose of this bag too.
Now that your air filter is clean and properly oiled, you can reinstall it into your KTM 50.
Reinstall the filter on the surface of the air boot, reinstall the cage, and now fix the seat back. This is all you need to clean the air filter.
You might want to add extra oil around or close to the edge of the filter or air boot to help seal but with the KTM 50, it is not necessary to do that. This is because the KTM 50 air filter cage is designed with the air filter perfectly fitting on the air boot to avoid space for leakage.
If you feel the need to still put some oil then just a little bit of oil will do.
Kickstarter Problem
When your KTM 50 Kickstarter develops a problem, this may be caused by a broken spring. However, when this occurs, the following guide has been provided to fix it.
How to Replace Bad Spring
- Remove the exhaust pipes and expansion chambers. Then drain the oil and coolant. You may need to replace these if they are bad.
- Loosen bolts around the sides of the clutch cover
- Pull the shaft off to expose the Kickstarter shaft. Now you can locate the broken spring
- Separate the gears carefully by lifting them off the box and placing them by the side or somewhere safe to enable you to reach the spring.
- Remove the clutch: You can use a clutch holding tool or impact gun for this. You can also get a clutch remover from the KTM store which will cost more.
- Hold the clutch basket with the clutch holding tool and use a 13-millimeter to loosen the bolts.
- After taking off the bolt, remove the clutch basket then pull off the clutch assembly gently out of the sitting compartment.
- You can now take out the bad spring and replace it with a new one. While doing this, be sure that the washer is sitting on the dowel. This is very important.
- You can now reinstall the Kickstarter shaft. The Kickstarter shaft will be held in place by the gear on the back of the clutch so you don't have to worry about it fitting.
- Reinstall the idler shaft too.
- Reinstall the Kickstarter cam. To do this the right way, make sure the little metal spring looking like a hook is properly lined up with the water pump gear. Also, check the order on the cover that will be reinstalled to be sure it fits in correctly.
- The spring on the Kickstarter cam or primary drive gear can be broken sometimes and we will show you how to fix it later on.
- After putting back the Kickstarter cam, reinstall the clutch basket and tighten the bolts.
- Reinstall the gasket. You need to check the gasket properly to be sure it is still in good condition. Whenever it is taken off, it often gets a lot of oil saturated on it which can cause it to wear.
- When all these are done, you can reinstall the cover and the bolts.
- Check for every other part if any is not properly placed and tightened enough. You wouldn't want to be having such problems at all.
Now, your KTM 50 mini-bike is all cleaned up and ready to go.
Rear Brake Caliper Problem
Whenever your KTM 50 mini-bike develops a problem with the brake and requires replacement, it is necessary to make use of lubricant to make the process easy and damage-free. Incorrect replacement of the part can cause further damage.
During the rebuild, lubricate the piston's rubber seal with brake fluid. When they are put in dry, they may rub hard on the O rings and leak that much right away.
A user had this experience with the KTM 50 SX 2016 model. When the user presses down on the foot brake lever, brake fluid leaks through the O rings on a caliper.
The user admitted not to have used lubricant during the rebuilding process.
Final words
We hope this article helped you fix the issue. You can let us know in the comment section how it turned out for you and if there was a challenge anywhere.
About the authors
The CarAraC research team is composed of seasoned auto mechanics and automotive industry professionals, including individuals with advanced degrees and certifications in their field. Our team members boast prestigious credentials, reflecting their extensive knowledge and skills. These qualifications include: IMI: Institute of the Motor Industry, ASE-Certified Master Automobile Technicians; Coventry University, Graduate of MA in Automotive Journalism; Politecnico di Torino, Italy, MS Automotive Engineering; Ss. Cyril and Methodius University in Skopje, Mechanical University in Skopje; TOC Automotive College; DHA Suffa University, Department of Mechanical Engineering


Add comment