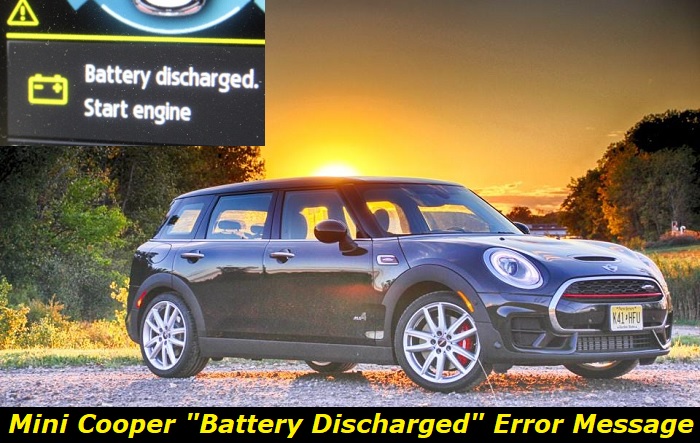
Seeing the dreaded "Battery Discharged, Start Engine" error message pop up on your dashboard can be a frustrating and potentially dangerous situation, as a dead battery can leave you stranded on the side of the road. But what exactly does this error message mean, and how can you fix it?
Battery discharged, start engine message highlights
- Common reasons:low battery, power drain, bad alternator
- How to fix:check the battery voltage,replace the battery
- Possible consequences:when the battery isdead, you may get stranded
- Priority level:High
- Can you drive?Yes
- DIY repair:Possible
- Repair price range:$200-$450

Why your Mini Cooper is Saying "Battery Discharged, Start Engine"
One of the most common causes of this error message is a weak or dead battery. Leaving the lights on for an extended time, driving short distances that do not allow the battery to fully charge, or simply having an older battery that is no longer functioning at its best are all linked to faulty batteries.
Another cause of this error message could be a defective starter motor. The starter motor turns the engine over and gets it started. If it is not functioning properly, the "Battery Discharged, Start Engine" error message can appear. And this can be due to a variety of issues, including a malfunctioning solenoid, a damaged starter motor, or even a broken wire.
A third cause of this error message could be a faulty alternator. The alternator charges the battery while the engine is running. If it is not functioning properly, the battery might begin to discharge, causing the error message to appear.
How to Fix the "Battery Discharged, Start Engine" Error in Mini Cooper
There is no need to panic if currently experiencing this issue. While battery issues can be annoying and inconvenient, a discharged battery is a relatively easy problem to fix.
Here's what you need to know about diagnosing and fixing the "Battery Discharged, Start Engine" error in your Mini Cooper:
- Check the battery
Make sure that the terminals are clean and free of any debris or corrosion. If you see any issues, use a wire brush to clean the terminals and make sure they're fully connected to the battery.
- Inspect the alternator belt
This component helps to charge the battery while the engine is running, so if it's loose or damaged, it could be causing the battery to discharge. Check the belt for any cracks or frays, and if it looks damaged, you'll need to replace it.
- The battery system
If the battery and alternator belt seem to be in good shape, it could be an issue with the battery charging system. This system includes the alternator, voltage regulator, and wiring, and if any of these components are faulty, the battery discharges. You may need to take your Mini Cooper to a mechanic to diagnose and fix this issue.
- Faulty starter motor
A damaged starter motor may not be able to crank the engine, which can lead to a discharged battery. A mechanic can test the starter motor and replace it if necessary.
It's also possible that the "Battery Discharged, Start Engine" error is simply due to a dead battery. If you've ruled out all other potential causes, it's a good idea to test the battery to see if it needs to be replaced. You can use a multimeter or take it to a mechanic to have it tested.
Symptoms of a Discharged Mini Cooper
A discharged battery can lead to issues with starting the car, as well as problems with electrical systems such as headlights and power windows. There are often less obvious signs that you ought to be aware of to ensure your battery doesn't deteriorate further.
So how can you tell if your Mini Cooper's battery is discharged?
- Checking the battery itself, looking for any visible signs of damage or corrosion. If you see any cracks or leaks in the battery, the battery may not be working properly. If you also notice a build-up of white or greenish-colored powder around the battery terminals, this is a clear sign of corrosion.
- Next, try turning on your Mini Cooper's headlights. If they are dim or flickering, this could be a sign that the battery is not providing enough power to the vehicle. Similarly, if you notice that your car's dashboard lights are not functioning as they should, this could also be a sign of a discharged battery.
- Another way to tell if your Mini Cooper's battery is discharged is to try starting the car. If you turn the key and the engine doesn't turn over, or if it takes a long time to start, this could be a sign that the battery is not providing enough power to start the engine.
- Many modern vehicles, including the Mini Cooper, have a dashboard warning light that indicates a low battery. If you see this light come on, it's a good idea to get your battery checked as soon as possible.
- Finally, if your Mini Cooper's battery is over three years old, it may be time to consider replacing it. Batteries tend to lose their capacity to hold a charge over time, so an older battery may be more prone to discharging.
Checking Your Mini Cooper's Battery
Here's a step-by-step guide on how to check your Mini Cooper's battery, if trying to diagnose and fix the "Battery Discharged, Start Engine" error message yourself:
- First, locate the battery. It is typically located under the hood, near the front of the vehicle.
- Check the battery for any visible signs of damage, such as cracks or bulges. If you notice any damage, it is likely time to replace the battery.
- Next, check the battery's fluid levels. If the fluid is low, you may need to add more distilled water or replace the battery.
- Use a voltmeter to test the battery's voltage. A fully charged battery should have a voltage of 12.6 volts or higher. If the voltage is below 12.6 volts, consider recharging or replacing the battery.
- Check the battery's connections to ensure they are clean and secure. Loose connections can cause issues with battery performance.
Noticed any issues with your Mini Cooper's battery? Address them promptly to prevent further problems. We recommend checking your Mini Cooper's battery at least once a month to ensure it is functioning properly. By following these steps, you can keep your battery in good condition and avoid any potential issues on the road.
Replacing Your Mini Cooper's Battery
Follow the correct steps and use the appropriate tools to avoid damaging the vehicle when replacing a Mini Cooper's battery. Here's a step-by-step guide:
- Locate the battery:The battery on a Mini Cooper is usually located under the hood, on the passenger side of the vehicle.
- Disconnect the negative battery cable:Before you do anything else, disconnect the negative battery cable to prevent electrical shock. Simply loosen the bolt on the negative terminal with a wrench and pull the cable off.
- Remove the battery hold-down clamp: Next, remove the battery hold-down clamp. This is a metal bracket that secures the battery in place. Use a wrench or pliers to loosen the bolt and remove the clamp.
- Lift out the old battery:Now you can carefully lift out the old battery. Be sure to lift it straight up to avoid spilling any acid or damaging the terminals.
- Clean the battery tray:Before installing the new battery, it's a good idea to clean the battery tray to ensure a secure fit. Use a wire brush or sandpaper to remove any dirt or corrosion from the tray.
- Install the new battery:Place the new battery in the tray and secure it with the hold-down clamp. Make sure the battery is positioned correctly and the terminals are facing the right way.
- Connect the positive battery cable:Next, you'll need to connect the positive battery cable. Tighten the bolt on the positive terminal with a wrench to secure it in place.
- Connect the negative battery cable:In the same way, connect the negative battery cable to the negative terminal.
- Test the new battery:Once everything is connected, it's a good idea to test the new battery to ensure it's working properly. Start the vehicle and let it run for a few minutes to ensure the battery has enough power to keep the engine running.
If you followed these steps correctly, you should now have a fully functioning battery that will keep your vehicle running smoothly. Just be sure to dispose of the old battery properly, as it contains hazardous materials that should not be thrown in the trash.
Conclusion
Fixing the "Battery Discharged, Start Engine" error message often involves replacing the faulty components, cleaning the battery terminal connections, and checking the wiring system for any damages. If the error persists after attempting these solutions, it is recommended to seek the help of a certified mechanic to properly diagnose and fix the problem.
About the authors
The CarAraC research team is composed of seasoned auto mechanics and automotive industry professionals, including individuals with advanced degrees and certifications in their field. Our team members boast prestigious credentials, reflecting their extensive knowledge and skills. These qualifications include: IMI: Institute of the Motor Industry, ASE-Certified Master Automobile Technicians; Coventry University, Graduate of MA in Automotive Journalism; Politecnico di Torino, Italy, MS Automotive Engineering; Ss. Cyril and Methodius University in Skopje, Mechanical University in Skopje; TOC Automotive College; DHA Suffa University, Department of Mechanical Engineering


Add comment